Sunday 9 March 2014

Guitar pick box evolution

So i fancied the idea of producing a number of these little boxes. they would priced low as a gift idea perhaps £10-£12. selling online would not pose any problems as they could easily fit into a padded envelope and be sent 1st class for very little. larger boxes i imagine will have more issues. for example how to pack? will it require a box? postage cost may be off putting to buyer? etc. etc.

with these thoughts in mind i decided this would be a good item to start my online shop at folksy.com

following my initial build of a pick box (which i gave to my son) i decided to make one or two changes. the first box was like this...


obviously it is the shape of a pick, but also the magnet is visible, sitting on the surface of box. i didnt like this, also i didnt like the fact that you had to fully turn the lid 180 degrees so as to get a pick out. As you can see in the picture here turning 90 degrees doesnt allow you to remove a pick.

i therefore decided upon this design...


I changed the shape to resemble the body of a guitar, (it looks awful due to my poor photoshop skills) I build the magnet into the box instead of on its surface. this does make the magnet connection weaker but still plenty strong to keep the lid closed in its place. frankly the osurface mounted magnets were a little too strong, on occasion ive wondered if someone welded it closed in my sleep. in any case i prefer the look and feel of this and so made four this weekend and plan to go   from here to my folksy.com shop and see about listing them.


Wednesday 5 March 2014

Guitar Pick Box build discussion

this past week I decided to make my version of a guitar pick box i saw (scroll down for my video) on http://www.woodworkingformeremortals.com/

The process i went through making this has helped me to evolve the heart box i made recently. future heart boxes will incorporate build ideas from this box. the heart box had the option of lifting off the lid, but with this pick box the swivel lid is fixed by means of a design feature of the dowel. (see pic below)

the dowel is made using brass, then a small nut was rounded on the grinder/sander and then using epoxy it was fixed to the brass, this prevents the lid from being lifted through the box. Also using brass as a dowel instead of wood is a much nicer look.

in making this pick box i quite by accident discovered that if i put one of the magnets inside the box instead of on top of the box it still works, causing the two magnets to fix together. This involves very precise drilling but it just looks so much prettier. this is accomplished by drilling from the bottom through to about 1mm from the top of the box, using epoxy to hold it in place, then when the bottom of the box is glued it conceals all evidence of the magnet as well as concealing the bottom of the above dowel.

both of these elements (Dowel/Hidden magnet) will be included in future builds like the small heart box intended to be a ring box which i will be making this week.

As my projects have been getting increasing smaller over recent weeks i was moved to make a couple of jigs. and wow they are just the best 2 things ive made in a long time. my hands were getting ever closer to moving parts like the band saw blade and drill bits. so first up i made a sled for the band saw. ive used one on my table saw. (which finally gave up and died today after 15 years) every table saw should have a sled. once you make and use one you can never go back. in fact i may never use my chop saw again because of the sled. but we digress... using similar build mechanics i build a sled for my band saw incorporating two stop blocks which also act as a vice to hold small pieces of wood like the pick box. this makes it infinitely easier to cut the top and bottom off of a box, completely removing my hands from any danger. im just so pleased with it. my hands as they are make most tasks very frustrating and difficult so when i come up with ideas to help, like this sled, its such a relief and pressure removed.

the other jig is nothing new in woodworking ive just never used one. a number of years ago i lent a friend a woodworking jig book i owned and in return he made me a jig which was a table top clamp. i appreciated the gesture but never did use it, however, this tiny pick box required very precise drilling steps and i was having difficulty holding the small pieces still on the drill press, so i build a small table that sits on my drill press table with a slot for my clamp to move along and hold even very small pieces in place for the drill press to do its thing.

with this clamp a permanent feature on my drill  press table i wonder why i had not done it sooner and now can not live without it.

often in the past ive thought of jigs as pointless time sinks especially if i will never use it again after this particular build is over. if you are unlikely to use the jig for years if ever whats the point. now, however im going headlong into making a variety of small boxes and other small projects with the goal of manufacturing a steady flow of these to sell at craft fairs and online shops like etsy.com i need to have a few jigs and other setups that i can have to repeat build steps quickly easily and safely. this means i need to be more alert to seeing the need for a jig instead of just muddling through.

anyhoo, both jigs can be seen here in the build video for the guitar pick box, if you like what im doing please subscribe and follow me on this journey into making beautiful boxes, and hopefully this thing that brings me enormous pleasure can also make some money and bring pleasure to others as they take these designs into their homes.

 
(this box was my first with the magnet showing, future ones will have the magnet hidden from view)

Saturday 22 February 2014

Ring box[es] part two

first up, im posting a picture of the template of my build for any who want it.

next is the music im listening to. i just love this old song! heard it in blacklist the other week and cant stop playing it :)

http://www.youtube.com/watch?v=s8rR7E6NfY4

anyhoo...

boy was that video edit a learning curve! took far too long. lessons learned though. any dialogue i plan in my next video will be well thought out and directed to the camera. it must also be a proper take with no editing required. the rest of the video recording will be done in silence and an audio dialogue track will be done post build during editing. its just so time consuming getting everything to sync up and look right.

I also decided to add a backing track for this video. I was of the opinion that if you needed music your video lacked substance or could not stand on its own merit. im now of the opinion that low level music can add a depth of feeling and mood. finding good music is another ball game entirely. this time just to get er done i chose a freebie from youtube which has no doubt been used exhaustively.

still struggling to get the time down on the video, i think this one was still over 12 minutes! oh well...
here it is


Thursday 20 February 2014

this weeks Ring Box build

This week i wanted to do a quick one day project. Ha! it seems a small build is just as time consuming as a larger one. I was keen to make my first box which included a hidden hinged lid with brass dowels. As i often do, i wanted to make a much smaller item, and once ive ironed out the kinks as well as my stupid mistakes i would make a full size box.

so with these build boundaries i set about using a scrap of mahogany that i couldn't bring myself to throw out. it was a piece too small to make a regular bandsaw box and just to big to bin.

i took my existing sketch of my hidden hinge box and shrunk it down in word to a size that matched my block of mahogany. My decision to make a ring box allowed me to make three boxes from this one block of wood.

Making three permitted me to make mistakes and learn better ways to build, all in one project. obviously as a result, all three boxes have turned out erm lets say unique! i learned the folly of not exactly aligning the holes for dowels on each end. as a result my first box is a little skew-if. because the dowels centre had a 1mm difference on each end! i learned that clamping the box up after gluing can cause the lid to be very tight. A future work around for this will be to place something, for example, a playing card on each side of the drawer which should prevent the glue drying the box too tight.
A tight box results in the need to sand the lid or sides of the box in order to ease the lid. doing this is difficult to do without sanding over a corner ruining the clean lines of the lid/sides.

between one thing and another it still took all week to make these three tiny boxes. I've been playing around with better lighting better audio and perhaps better video. this has dramatically increased the time it takes to build something, and a large part of me wants to give up on this aspect of my wood working. due to health reasons, everything takes tens times longer than it should at the best of times and so adding video, lighting, audio setups is laborious.

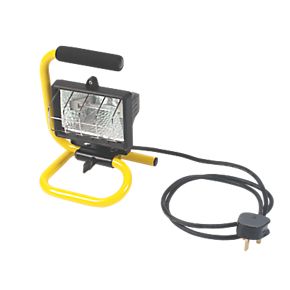
regarding my light changes. i went uber cheap! i bought one of these... £15
Portable Site Light 240V 400W

http://www.screwfix.com/p/portable-site-light-240v-400w/46377#

and one of these... £12.50

Portable Work Light 120W 240V
http://www.screwfix.com/p/portable-work-light-120w-240v/55370

my workshop now lights up like the "Blackpool illuminations". without converting them to a soft box kind of setup ive had to be very careful about positioning the lights as they can cast huge shadows or cause huge reflections, for example on my glasses. im sure they will be great for photographing the finished products and achieving that white background i want.

they have caused a few problems on camera two. i bought a holder for my phone so i can use this to film simultaneously from two positions and avoiding glare from the lights that support my main camera is tricky is such a small space. im learning.

i wonder though if im over complicating things. i could just film during the day under normal shop lights from one camera and be done with it. my problem is, i always want to improve, whatever i did last time can be better this time. this mind set can create unnecessary burdens.

my editing job for the finished video is becoming too much. i need to work on a storyboard or something so as to have a clear path and order of steps. apart from anything it has to be watchable, so edit edit edit. so now i have two video feeds to edit plus im now using a separate audio device called m-audio microtrack 2.


It creates a wonderfully clean audio track. something i wouldn't normally notice, but when played alongside the audio provided by the my video camera, its hugely better so i cant bring myself to not use it in future videos. this despite the obvious audio sync drama. im considering completely redoing the audio and creating an audio track at the time of editing instead of during the  build. we shall see...


pictures and youtube video of my ring boxes to follow... tomorrow!

Sunday 16 February 2014

slippy sandpaper

I mentioned in casual conversation the other day, what a numpty i had been, that for years i didn't realize you had to tighten the nut on a drum sander kit in order to secure the sandpaper. if you don't do this the paper slides around, especially when you press a piece of wood against a spinning drum.

This was new information to the person i was speaking to, and naturally they were pleased to find out how to secure that pesky sandpaper.

It made me think that maybe there are others out there (as daft as me) who despite being intelligent individuals, they may have just concluded that they had bought a rubbish product that didn't do as advertised.

 If the 2 minute video that i posted today helps one person out, im happy to have helped :)


Thursday 13 February 2014

Analysis of heart box build and video

As I go through this learning curve I thought i'd share my thought process and we can maybe learn together.

here is the video and build under review...


what do I like... ummmm.

ok, i like the fact that i lowered the audio when a power tool was on. there is nothing worse than watching youtube at midnight, you listen to someone explaining what they are doing then a shop vac and table saw power up. there is a reason we wear ear defenders! shouldnt need them in front of my pc!

what needs improved for next time?

1) better lighting. i have a few small lamps that support the lighting in my workshop that i must set up each time i film something. its a pain moving everything each time. adding considerably to the build time.
2) be more aware of camera position. sometimes i block the camera with a shoulder. its unsafe to be thinking about the camera while cutting something so i need better setups here.
3) good grief speak up man! i must next time enunciate! mumbling is not the way to go. i may even record audio seperately on another device post production and add it to the video when editing. since im not directly looking at the camera just now its not a sync issue. i will try next time, and see what happens.
4) succinct! i want to be able to maybe half the length of a build video. how do these other guys cut it down to 7 mins???
5) i want to try a wider view of the shot and maybe pinch my sons camera and get a close shot to show both when for example making a cut on the bandsaw. this may solve problem 2 but make problem 4 more of an issue. vee shall see.
6) I hate looking at my hands through the video but not sure what can be done there.

so thats video sorted. what about the box build itself?

well when it came time to glue the back on... @ 4:10 i only glued the back!!! forgetting to glue the joints of the two half's of the heart. doh! this has made for a weak joint. i tried separating the box a little and squeezing a little glue into the 'crack' it helped a little but it has left a line where the two bits of wood meet. dont do that again Stewart!

the magnet 6mm is a little bit too strong for this size of box. it reeeeally clamps shut. so maybe next time either use 1 magnet instead of 2. i had one top and bottom. maybe a small nail or something would suffice.

more care needs to be taken over the placement of the magnet when placing on the box. it caused the one on the lid to be dangerously close to the edge.

i love combining two species of wood and i like the look of this box. maybe a redder wood for the lid and back wood have been better in this case as its well, you know, a heart!

im very pleased with the over all dimensions and plan to make several of these.

Wednesday 12 February 2014

Box Beginnings part 2

As I made more boxes and had increasing numbers of willing recipients, it kept getting suggested that i sell my boxes. This is where i find myself now. im more or less done making these boxes as gifts so its time to try and market a product! (talk about cheapening something) anyway its really quite therapeutic for me to build these boxes and so if i can maintain this expensive habit by selling some boxes, it will allow me to keep supplied with fresh exotic hardwoods and sharp blades.

to that end, i have finally engaged with social media, https://www.facebook.com/stewart.gaskin.1
and  https://www.youtube.com/channel/UCZ6UlnGwAuFBsHpQLta2URA

below are the videos i posted these past few days...


this was my first. i just liked the idea of showing a block of wood morphing into a beautiful box. this box is for my aunt who will be collecting in person this saturday :)


I plan to make boxes for certain times of year, for example, below is a heart shaped box i finished today. (its design needs a few tweaks but  looks nice)

the format i plan to do for a time is to make a video like this, kind of like a product display. and then follow up with a build video, kind of a step by step how to. we shall see. example below...

If you are interested, feel free to subscribe to my youtube channel and follow me here on blogger. i will update throughout the year. i plan to comment on things pertaining to my builds that i dont get to mention in the videos, so check back when i load a new video.